This post is slightly late but i need to record a problem and a solution that occurred when i was trying to edit a few lessons ago. By the 'situation' i mean that when i was editing i discovered that i had a REALLY BAD continuity error which is going to be difficult to figure out. This problem is of a shot of my killer on the steps - these steps are where my victim is going to be killed but in this particular shot, my victim isn't in it. It is hard to describe the situation, but here is the best i can do:
In the alleyway that i filmed, there are two separate set or steps, where in the middle of these steps, there is just a plain, straight 'walking-bit'. I discovered that a shot of over my killers shoulder and aiming at my victim was filmed at the bottom of the first set of steps. This is wrong because another shot has my killer pointing the gun from the bottom of the second set of steps. This doesn't make sense, but the only way i could make this somehow look more realistic and unnoticeable is to have a shot of my killer just walking along the straight part of the pathway (which is in the middle of both sets of steps). However, i did find that i did have a shot of this BUT, my killer is walking the wrong way (she was walking left when she was meant to be walking right - where right is the direction to the second lot of steps). So i was shown on final cut that you can 'flop' the shot, making my killer walking the way i wanted her to - right.
However i believe there is a separate solution to this problem without using final cut. I think that i might be able to get away with it if i don't have this walking shot at all, so somehow she has jumped from the middle section of the steps, to the bottom - creating suspense and wonder in how she has done this - it could make it look a bit creepy to how she did this. I did want this scene to look quite jumpy anyway so i think this could contributed to this effect i wanted to achieve.
This 'jumping' problem only highlighted another problem i had. If i decided to use the walking shot, there is a slight hill on this straight flat pathway between the two sets of steps so she was walking slightly upwards, to then walk down the sets of steps - doesn't make sense. So i can either use final cut to rotate the frame, just leave the shot and try to get away with it or i could not use the shot altogether. To decide what i am going to do, i will have to finish the rest of the editing so i can see how the whole thing flows, and then figure out this solution. I am completing my editing session on the 28th of February.
Thursday, 10 February 2011
Preparing to film tonight.
Tonight, i have my friend round (she plays the femme fetales and the killers) and my dad round who plays my male character (the businessman and future victim) so we can film the poker scene of my OTS. I am still in the process of editing the following half of my OTS which will be completed as soon as i can. I have made a lot of preparations to film this second half as there is a lot involved to create the atmosphere i am aiming for. Here is the quickly thought out list of the things i have done and thought abot to make sure i am ready to film tonight:
- The table. I have organised the location of the table, which is in the back of my living room (technically the dining room) and there is curtains behind the table. These curtains will look effective when the light shines on them - creating shadows. I also think these curtains will create a closed-in effect which i am aiming for. As i havent been able to find a round table for my OTS, i have had to work with my big rectangular dining table. If i use the edge of the table,. and try not to focus on the table too much, im sure i will be able to get away with it.
- The cloth for the table. I have got a dark cloth which will cover the table. I mustnt focus on this too much as i think a rich buisnessman would have a proper felt cover on the proper poker table. I must have a cloth on it because it would hide the wood of the table and also if the cloth is dark, add to my mysterious and dark atomosphere. I also think the dark colour will contrast well with the colour of the cards and money.
- The cards and money. I have borrowed the cards off of my dad, and they are the traditional sized cards and designs. The money i something i have to organise in my media lesson today. As i cant use the money that is used in this present time, i am thinking i might have to print off some early 150s money to lay on my table set. I will talk to my teachers about this today, and i have to make sure it is right because i am filming a few close ups of the money.
- The floor. The floor of my dining room is a very 70's (my OTS is set in the 1950's), but as i only need to film a shot of a femme fetales foot and my victims cuff, im sure this will not matter dramatically. The light will shine off of this floor creating some reflection and hoefully, even more shadows.
Here is an example of my floor, which will hopefully be diguised with darkness, shadows and the black and white effect i am adding to my whole OTS (conventionally 1950s).
"The Younger Ride" Credits from Emma Gael on Vimeo.
I like the layout and the picture beside the credits, the way the camera moves up the stairs with the text and the colour of the background. However, this does look really modern and it looks very homemade (its obviously not an actual film noir).
These credits are from an actual, real film noir and are a good example of what i am trying to achieve. The filming is quite wobbly but that greatly reflects the time this film was made and looks very legitimate. I dont think i will be able to achieve this 'wwobbky'; effect without printing put the planned credits and then filming them. I do like the idea of using fading to change from one credit to another - thisis would be easy to achieve and would look very
- The table. I have organised the location of the table, which is in the back of my living room (technically the dining room) and there is curtains behind the table. These curtains will look effective when the light shines on them - creating shadows. I also think these curtains will create a closed-in effect which i am aiming for. As i havent been able to find a round table for my OTS, i have had to work with my big rectangular dining table. If i use the edge of the table,. and try not to focus on the table too much, im sure i will be able to get away with it.
- The cloth for the table. I have got a dark cloth which will cover the table. I mustnt focus on this too much as i think a rich buisnessman would have a proper felt cover on the proper poker table. I must have a cloth on it because it would hide the wood of the table and also if the cloth is dark, add to my mysterious and dark atomosphere. I also think the dark colour will contrast well with the colour of the cards and money.
- The cards and money. I have borrowed the cards off of my dad, and they are the traditional sized cards and designs. The money i something i have to organise in my media lesson today. As i cant use the money that is used in this present time, i am thinking i might have to print off some early 150s money to lay on my table set. I will talk to my teachers about this today, and i have to make sure it is right because i am filming a few close ups of the money.
- The floor. The floor of my dining room is a very 70's (my OTS is set in the 1950's), but as i only need to film a shot of a femme fetales foot and my victims cuff, im sure this will not matter dramatically. The light will shine off of this floor creating some reflection and hoefully, even more shadows.

- The costumes. Eventhough i have grouped together a whole lot of black, sequins, lace and fur clothes, there is no specific outfit for my femme fetale to wear. I have decided (mentioned in a few previous posts) that i am going to throw as much of these essential items on my characters and to see if they work. I musnt worry about this too much as i am not planning to do very many close ups of what they ar e wearing. The whole affect, however, needs to be black. I have asked my dad (the male character and victim) to wear a dark suit with a white shirt - and to be quite similar to what he wore for when we were filming the following scene. I have never asked him to wear a tie or anything like that - the reason is because i was to give the effect that he is very relaxed and confidant - leading onto the sense that he is quite arrogant.
- The film camera - The compact camera i have at home is very simlar to the ones we have at school, however, my camera has problems when i try to charge it and it is reluctant to do what i want it to. I will ask my teachers if they can loan me a camera just for tonight and then return it tomorrow.
- The camera - I am planning to take a few pictures of what my set looks like and what my characters and props look likw when the whole thing is set up. I am also planning to have somebody else take a picture of my while i am directing or informing my characters of what to do. These pictures will document and prove that i have directed, so i will snap away!
- Sound - i do not have dialogue in this part of my OTS, i am organising to have a dark, atmospheric sound which is conventional of a film noir in the 1950s. I am not going to finalize the music i am going to have because im aware that if i do, then the sound might not fit to the filming and it just wouldnt work. So i am waiting until i havge completed the editing.
- Credits - I am in the process of photoshopping muliple possible combinations of backgrounds for my credits - changing the font, colour and positions of the title but wit the same city scene background. I have done some research of different film noir titles by looking on the internet and by watching ones on the screen (note: the credits from the film noir 'Notorious' are quite simlar to the effect i am trying to accomplish). Here is the edited photo which will be the backdrop to the writing of my title. The original photo was darken to result in this photo. I wanted to set the scene of mysterious night time.
This is the first attempt at puttin text onto my photo and the font is 'century gothic'. I want to put the word 'death' in capitials and in bright red because i think is over dramatic (quite 1950s) and it stands out - showing the viewer what the theme of this film will be. So when my OTS is watched, my target audience will know what is going to happen. But only when they watch it will they know where the word 'cheat' comes into it. When i took the photo, i made sure there was a lot of sky, so i would have plenty of room to add text to it. I did because it has allowed me to have the text as big and dramatic as i want - the larger the text, the more impact and drama i create. When i have presviously watched film noirs, the font is very similar to this.
I really like this one. The font is 'New Times Roman' and is bolder than the previous one - meaning that the red of the word 'death' is bolder. Its easy to read, simple and most importantly, i think it suits the 1950s. The word 'death' is also very central to the text above it - making it the main focus. So the viewer would look at the word 'death' and then look at the rest of the title. I have decided to go with this example and it will feature at the start of my OTS. I have decided to have the actors names, the directors names and producers etc BEFORE the title of the film comes up. So its the last piece of text the viewer reads.
Adding the credits is the last thing i am going to do when i have finished editing, and will be done by using iMovie. I have organised what my credits will say with help from this videos i found on Vimeo and youtube:
I like the layout and the picture beside the credits, the way the camera moves up the stairs with the text and the colour of the background. However, this does look really modern and it looks very homemade (its obviously not an actual film noir).
These credits are from an actual, real film noir and are a good example of what i am trying to achieve. The filming is quite wobbly but that greatly reflects the time this film was made and looks very legitimate. I dont think i will be able to achieve this 'wwobbky'; effect without printing put the planned credits and then filming them. I do like the idea of using fading to change from one credit to another - thisis would be easy to achieve and would look very
Tuesday, 1 February 2011
How i use digital media when creating my blog, evaluation and final production.
I have decided to link the prezi i did about the ways i use digital media in one day, to how i use digital media when creating my blog, evaluation and final production (completed film noir OTS). I think that a lot of the digital media i use in one day has something to do with me doing media for an A level. Ironically, i am just doing a post to show how i use it in a media project, not using very much digital media. As i havent yet completed my whole final production and evaluated it, i have written digital medias which i know i will definately use, and the i can write some more in later if i missed any. Here is the list and explanation of digital media (technology) have used so far and in the future to create my blog, evaluation and final production:
- Camera - To take pictures of costumes, locations, lighting, (etc) and sometimes printed work which needs to go onto my blog without using my scanner or just uploading it onto a post.
- Scanner - I have used one to scan from old 1950's magazines and books to help me with costumes and writing fonts. I also have used it to scan written and printed work which i need on my blog, but didnt want to just post it - i wanted to use a different kind of digital media.
- Ipod - I sometimes listen to it while im blogging and i have used it previously to take pictures and videos to then put them on my blog as it is compact and easy to carry around. It is also very quick and efficient.
- Video camera - I have used this to video a couple of storyboards, we used it to film our continuety task which is on the blog and also our concept board live presentation.
- Digital camera - I will be taking photos before, during and after i am filming so i can record the lighting and postitions of people.
- Microphone - As i only have a small amount of dialogue which luckily is said when you cant see my male characters faces, i will have to use a microphone to record the telephone conversation.
- Mac - To get on the internet, iMovie etc.
- Final Cut - I wasnt planning to use this but as i might need to flip a couple of clips so my characters are walking the opposite way during the following scene.
- iMovie - To edit my filming, apply transitions and effects, sounds etc.
- Radio - I am planning to use my 1960's radio which i will then play sound through to create an old-sounding sound.
- Photoshop - I used this to create different combinations of credit backgrounds.
- Ipod - It helped me when i couldnt use my ordinary digital camera to take pictures of different things. I also used my ipod to film a storyboard because it is quick, simple and easy to use - just the touch of one button!
- Blog
- Camera - To take pictures of costumes, locations, lighting, (etc) and sometimes printed work which needs to go onto my blog without using my scanner or just uploading it onto a post.
- Scanner - I have used one to scan from old 1950's magazines and books to help me with costumes and writing fonts. I also have used it to scan written and printed work which i need on my blog, but didnt want to just post it - i wanted to use a different kind of digital media.
- Ipod - I sometimes listen to it while im blogging and i have used it previously to take pictures and videos to then put them on my blog as it is compact and easy to carry around. It is also very quick and efficient.
- Video camera - I have used this to video a couple of storyboards, we used it to film our continuety task which is on the blog and also our concept board live presentation.
- Final production
- Digital camera - I will be taking photos before, during and after i am filming so i can record the lighting and postitions of people.
- Microphone - As i only have a small amount of dialogue which luckily is said when you cant see my male characters faces, i will have to use a microphone to record the telephone conversation.
- Mac - To get on the internet, iMovie etc.
- Final Cut - I wasnt planning to use this but as i might need to flip a couple of clips so my characters are walking the opposite way during the following scene.
- iMovie - To edit my filming, apply transitions and effects, sounds etc.
- Radio - I am planning to use my 1960's radio which i will then play sound through to create an old-sounding sound.
- Photoshop - I used this to create different combinations of credit backgrounds.
- Ipod - It helped me when i couldnt use my ordinary digital camera to take pictures of different things. I also used my ipod to film a storyboard because it is quick, simple and easy to use - just the touch of one button!
- Evaluation
Sunday, 30 January 2011
Fact.
I heard something quite interesting today about Alphred Hitchcock and his films: He always appeared in them. Never as a main character, but often as an extra. So now, every time i watch one of his films i am going to have to see if i can find him. But as he is soo famous - would he have worn a disguise? If he did it is going to be extra hard to find him!
Thursday, 27 January 2011
Experimenting with unnatural light.
This didn't really apply to my outdoors following scene as i couldn't control the streetlights but when i film my poker scene i have to place different lights in different ways to create different moods. To help me with this, i got my female actress to sit in one place (which is what she does during the poker scene) and i move the light around her to see what effects i can create. As i was limited to the amount of light i could actually use as there were only a few spotlights available, i tried the best i can to create various shadows on her face. These photos are SHOCKINGLY bad at showing my 'photography skills' but these pictures only show how unnatural light can shine on somebody's face. Also, i need to note that my OTS will be in black and white, and these photos are in colour! So here they are and i have also added a few explanations about the good and the bad of each photo:
Ignoring the blur on this photo, i like that the unnatural light has highlighted her face and left the background completely black. The light was shined straight to her face by slightly angled down. This has made her cheekbone more defined - which adds to the seduction and glamour.
I think if the light was making her cheekbone stand out, it would have made the light more appealing. But as it is just straight onto her face which is flat. However, i do like that the camera is pointing up, so you can see the outline of her jaw bone.
I really like this photo, not only because of the dark background but the angle she has her face in and the height of the camera can show that she is mysterious, reserved and delicate.
I'm not too keen on this picture as it looks as if she doesn't actually have any long hair which is sweeped beside her face. You cant see the expression in her eyes (because you cant see her eyes!) and no cheekbone is defined. But i do like that her face is in focus and her shoulders aren't.
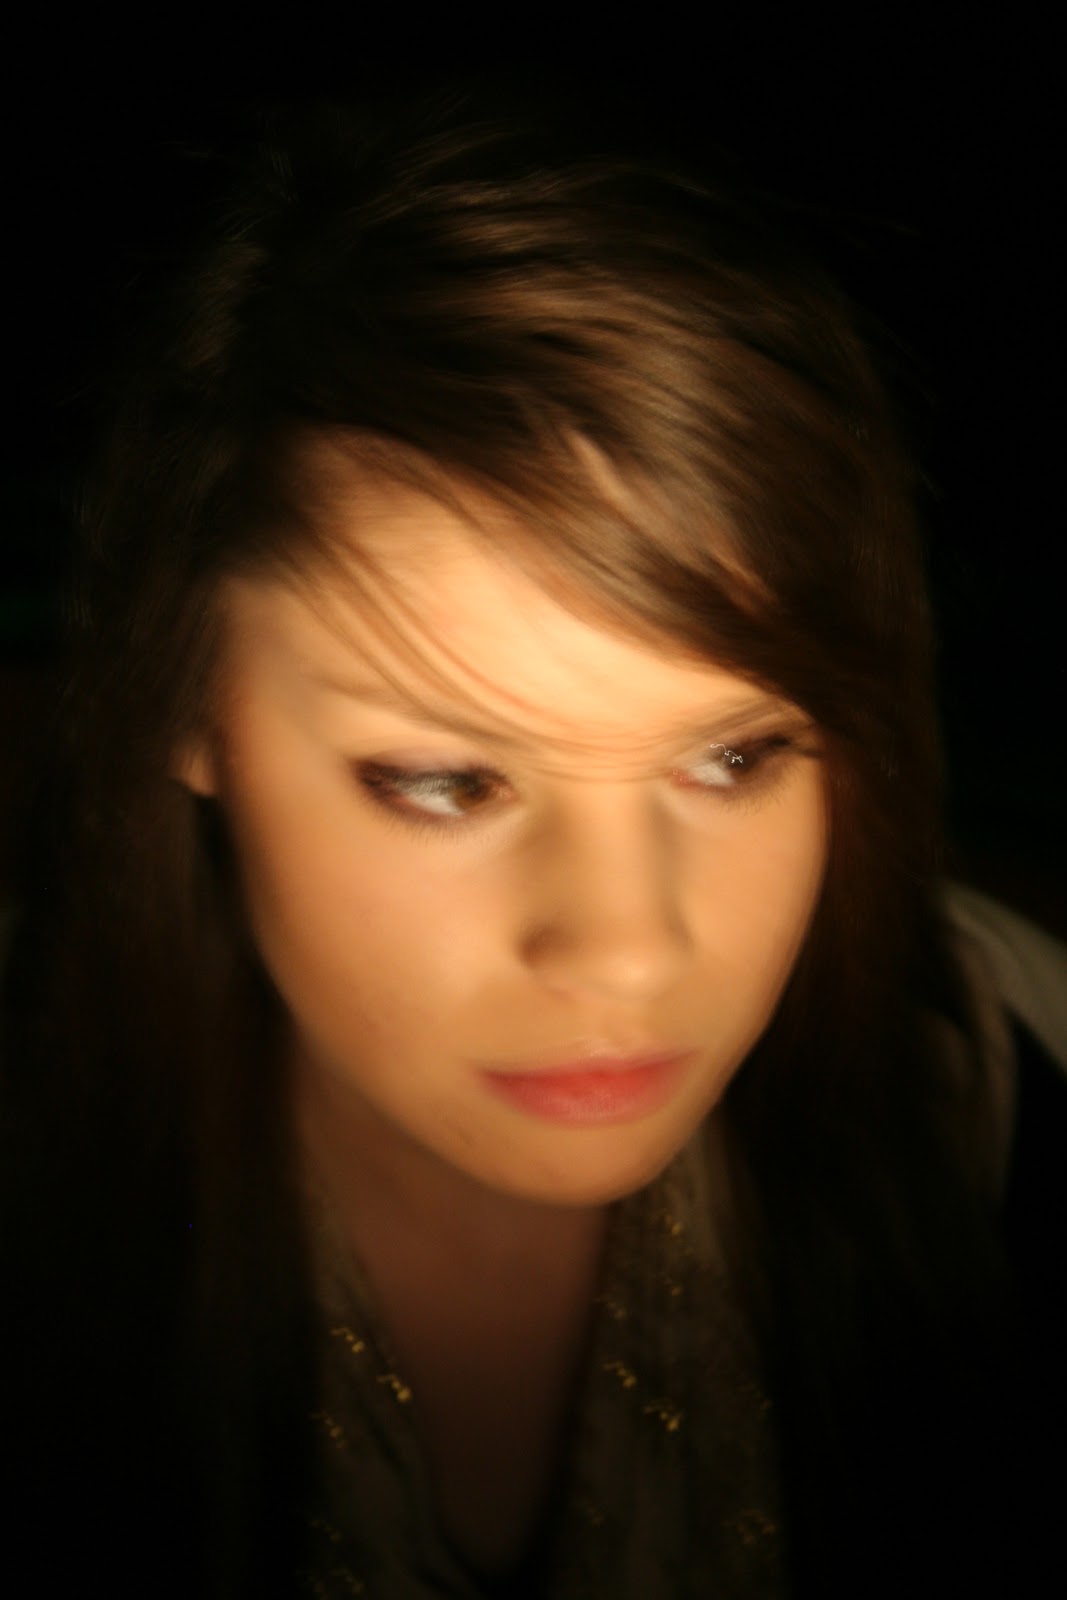
This reminds me of a film noir shot as she is looking down and the camera is then looking down on her. You can see her eyes, cheekbone and the background is black. I also like that the light shining off of her necklaces is visible - possibly showing her wealth and sophistication. Probably the best shot so far.
I love a profile shot, and she has a lovely profile so I'm sure that when i film my OTS, i could replicate this photo in a screen shot.The lighting is very soft and light, but unfortunately it is coming from underneath her chin, making her nostrils attention-seek with the light shining on them!
In this photo i was trying to capture her hair, but still create a black background.I do quite like this angle as her eyes are dark and her profile is lovely. I love the small amount of light shining on her face - very subtle and delicate.
Just like the previous one, her face isn't in the light - which should be! You cannot see her expression and our attention goes straight to her head. Her eyes and chin are in the dark but her nose is in the light. Not what i was aiming for particularly!
AGAIN, the light is shined straight at her head, but as the shine is nearly out of the shot, it doesn't matter as much. Its a shame that there is no diversity of shadow-shades on her face - the light is flat. I like the position of the camera looking down on her.
I really like the angle of the camera in this one, she looks very sweet and mysterious - we wonder what she is looking at. I tried to capture her eyelashes against the light background because i think that could show femininity. I'm not impressed by the straight light on her chin, it looks a bit strange! I like that she is in the bottom right half of the frame but i would have liked it EVENMORE if the background was black.
If only the background was black! But this photo has captured her eyelashes and i like the half in the light, half not in the light thing. If this photo was taken from slightly higher, i think it would have created more of an effect.
I like that even though half of her face is in the light, and half of it is in the dark, you can still see her whole face. If only it was taken from slightly higher then i think it would have been more interesting and perfect. To also improve this photo, there could have been more shadow on her shoulders to really make her face stand out.
This picture is a bit too close-up and i think that the shadow could been a little darker. Too much of the background is in the light so we are distracted.
If this was taken a little bit lower it would be better, because at the minute, she looks as if she would be very short! Her eye that is in the shadow is undefined.
Not the most flattering shadows and the light is wayy to strong on her neck as you. Her nose also has a strange shadow in it - making us focus straight away on that.
When taking these photos, i tried to play with interesting and different angles which could be possible when filming with a film camera. I have to take into consideration whenever looking at these photos that i am filming completely in black and white which could affect the tone of shadows and light. However the similarity with black and white shots and colours shots is that - the brighter the light, the brighter it will turn out on camera and the darker the shadow, the darker the shadow on the camera. I'm glad i had a little practise with the way light can effect mood and impressions of people which I'm sure will come in useful. I need the audience to guess right about a character because there is not a lot of dialogue. The audience needs to guess what a character is like and have their own opinions on them without the characters actually speaking.
First editing session and problems with separate clips.
Today, i thought it was about time to start editing even though i have only filmed half of my OTS. I think editing this half will give me more time to edit the soon-to-be-filmed other half and gives me a chance to experiment with Imovie. I may also play with a computer file called 'final-cut' which lets you cut certain objects out of shots. It can also help you to add more effects that iMovie offers. I may use 'Final-cut' to cut some posters out of a shot i have. This shot is of the telephone box on it own, and to the left of the telephone box is scraps of ripped off posters which I'm not too sure this really fits the 1950s feel!
I played all of my clips and was quite glad that i had all of the right shots i needed, but concerned about continuity and have the angles i had planned to have in my finished OTS. So far, i have only edited up to the part where my male character in the telephone box and the mysterious lady walking past (excluding credits etc) but i did have a problem.
This problem is that i had a shot of the telephone box with lasted about 7 seconds with no male character walking into it. According to my storyboard there had to be a short while (around 7 seconds) of just a shot of the box and then my male character walking into the box, look around and then pick up the telephone.However, for some reason, i didn't film the male character walking into the telephone box after waiting for 7 seconds - i just stopped the clip. The next clip was of the telephone box again, but this time after around 2 seconds my male character actually did walk into the telephone box. I couldn't fit these clips exactly together because you would be able to tell that they were different clips. Also, i wasn't in the EXACT right place when filming both of these shots.
To fix this problem, i added in a transition effect between both of the shots - this transition faded out of the first shot, then faded into the next. Having this transition meant it didn't matter as much that i wasn't in the same position and also the fading in-out effect gave the effect of time passing by. Sorted.
I have been trying to stick EXACTLY to my storyboard, which i shouldn't be doing, as these ideas might not actually work with the footage. I'm never going to dramatic changes, but i might have to adds things in to make it flow a bit better, but the whole chronological order will be very similar to my storyboard. Any changes that i do make, i will identify and explain with posting.
Tuesday, 25 January 2011
Targets for the next three weeks.
- PHOTOSHOP POSSIBLE TEXT ONTO MY BACKGROUND PICTURE TO TEST WHAT IT WOULD LOOK LIKE.
- SEND OUT A FACEBOOK POLL!!!
- Make sure that all videos needed on blog are actually on it, with me evaluating and commenting. Including the continuety storyboard and my concept board presentation.
- Make sure i have filmed and edited my OTS in time for the DEADline and while i was filming the poker scene, i took photos of me testing the layout and lighting.
- Make sure all of the boxes are ticked on the to-do list in booklet.
- Finalise sound
- dont more posts on sound and lighting
- Take photos of me experiementing with light on my actresses face
- plan the FINAL text which will go ontop of my city scene - organise the font and colour etc.
Setting targets: are they...?
specific
measurable
achievable
realistic
time related
Subscribe to:
Posts (Atom)